Vinyl textiles upholstery Care & Cleaning Guide
Vinyl upholstery is well known for its durability, physical strength, and stain and water resistance. However, some maintenance steps must be carried out on a regular basis to extend its life. The amount of use and ambient conditions will determine the frequency and type of cleaning that the vinyl should have. It is not unusual for stains and dyes from clothing fabrics to be absorbed into the vinyl matrix. Care must be taken to avoid removing plasticizer from the vinyl through the use of strong solvents, as this will cause the vinyl to become brittle and its service life will be greatly reduced. The steps below can serve as a guide for the care of vinyl fabric:
- Use a mixture of mild soap (neutral pH) and water (1 part soap to 10 parts water) to clean the vinyl using a soft white cloth or sponge.
- Use clean water with a soft cloth to remove excess soap.
- Wipe dry immediately with a clean, dry, white cloth. There should be no soap residue on the vinyl surface.
- Light colors, such as white, require a higher cleaning frequency.
NOTE: If dirt is embedded, you can rub the vinyl moderately with a soft bristle brush and soapy solution. Then repeat steps 2 and 3.
- The key to keeping vinyl upholstery clean is to remove grease, dirt and debris as quickly as possible after the spill occurs.
- DO NOT use abrasive or solvent cleaners, especially those that contain concentrated bleach, petroleum distillates, or concentrated detergents.
- To remove dry stains, vinyl can be cleaned with a mixture of mild detergent powder and water (use 1 part mild detergent powder and 5 parts water). Apply the solution to the stain and wait a minute or two for the detergent to work. Then, gently rub the area and rinse with plenty of clean water. Be sure you have removed all soapy residue. Dry with a clean dry cloth.
- Liquid spills (coffee, tea, liquor, wine, suntan lotion, soft drinks, etc.). If the spill is cleaned before it dries, it can be easily removed using an absorbent paper towel. Clean the area with a damp cloth, and then dry with a clean cloth. If the stain has already dried, go to step 3.
- Sauces and thick spills (tomato sauce, mustard, etc.): collect as much of the spill as possible with a dry cloth, rotating the cloth and without pressing it on the vinyl surface. Repeat this process if necessary, and if the residue remains, go to step 3. Clean the area with a damp cloth, and then dry with a clean cloth.
- Blood, Urine, Bird droppings: wipe with a sponge moistened with a mixture of soapy water and household ammonia (1 part of neutral pH soap, 5 parts of household ammonia and 5 parts of water). Remove the soap with a damp white cloth until no soapy residue remains. If stain remains, it should be washed with a diluted bleach solution (10% bleach, 90% water). Finally, dry with a clean cloth.
- Lipstick, grease, oil, eyeshadow, shoe polish wax: apply a small amount of household cleaner (such as Fantastik®, Formula 409®, Fabuloso® or the like) mixed with water (in a 1: 1 ratio ) using a cloth and rub. Wipe with a damp cloth until no cleaner residue remains, then wipe dry with a clean cloth.
- Ballpoint pen, permanent marker: these inks could permanently stain the vinyl. Cleaning immediately with a 1: 1 mixture of 99.5% Isopropyl Alcohol and Water can remove much of the stain. Then wipe the area with a damp cloth and then dry with a clean cloth.
- Our products do not transfer color to other materials, but some garments with low quality dyeing processes can transfer their color to vinyl material. Apply a small amount of household cleaner (such as Fantastik®, Formula 409®, Fabuloso® or the like) mixed with water (in a 1: 1 ratio) using a cloth and rub. Wipe with a damp cloth until no residue from the cleaner and then wipe dry with a clean cloth. Remove stains as soon as they are detected. Up to 100% cleaning is obtained if these stains are cleaned within 24 hours, up to 80% after 48 hours and up to 50% after one week.
- The cloths that must be used for both cleaning and drying must always be white.
- The brushes that are recommended in some points should always be of soft bristles.
- Powder abrasives, abrasive cleaning products, metal sponges or brushes, and industrial cleaners are not recommended for vinyl cleaning.
- Cleaners based on citrus extracts are not recommended.
- Unspecified cleaners should not be used. Additionally, strong lacquers, inks, cleaners and detergents, solvents such as paint thinner, acetone and MEK, can be effective in removing stains, but cause immediate damage and contribute to material deterioration. The use of these cleaners is at your own risk.
- Wax should never be used on vinyl, as it will cause premature cracking.
- High power or pressure equipment should never be used to wash the vinyl.
- Always follow the safety recommendations of the manufacturer of cleaning products.
Tarpaulins Care & Cleaning Guide
Due to their mechanical resistance, dimensional stability, easy cleaning, easy installation and color stability, Nuvant Tarpaulins can remain functional for several years, however, some external factors and their inadequate installation and/or maintenance can reduce this period of time.
Follow these simple steps on a regular basis and you will be able to extend the lifecycle of your products.
- Use a mixture of mild soap (neutral pH) and water (1 part soap to 10 parts water) to clean the vinyl using a soft white cloth or sponge.
- Use clean water with a soft cloth to remove excess soap.
- Wipe dry immediately with a clean, dry, white cloth. There should be no soap residue on the vinyl surface.
- Light colors, such as white, require a higher cleaning frequency.
NOTE: If dirt is embedded, you can rub the vinyl moderately with a soft bristle brush and soapy solution. Then repeat steps 2 and 3.
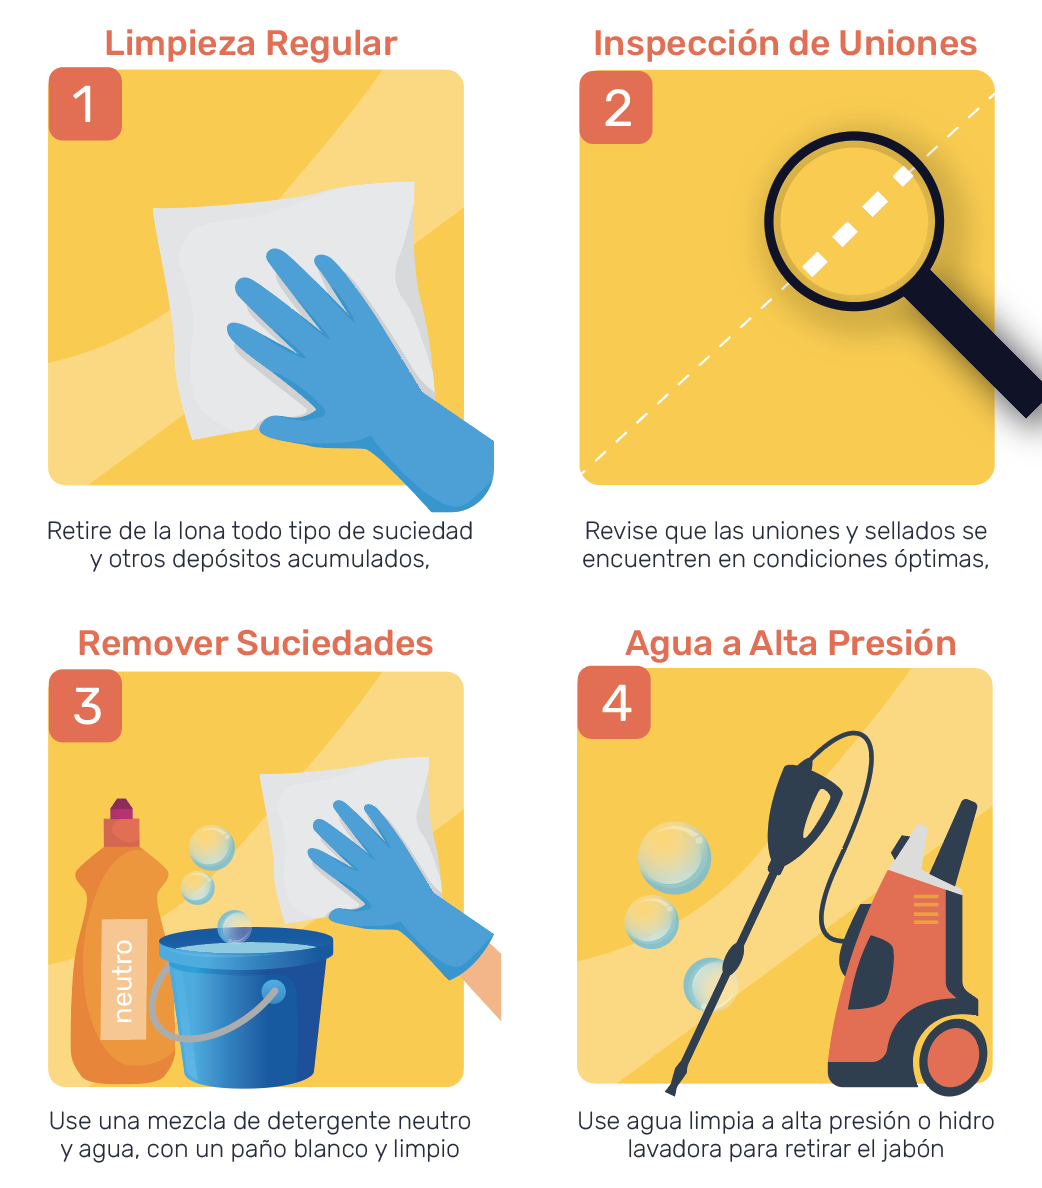
Use neutral soap to remove layers of dirt, oil, grease where necessary. In case of difficult stains, use isopropyl alcohol directly on the stain with the help of a clean white cloth.
Other substances such as aliphatic solvents can be used in extreme cases, since their regular use can cause deterioration in the appearance of the material.
cutting stage
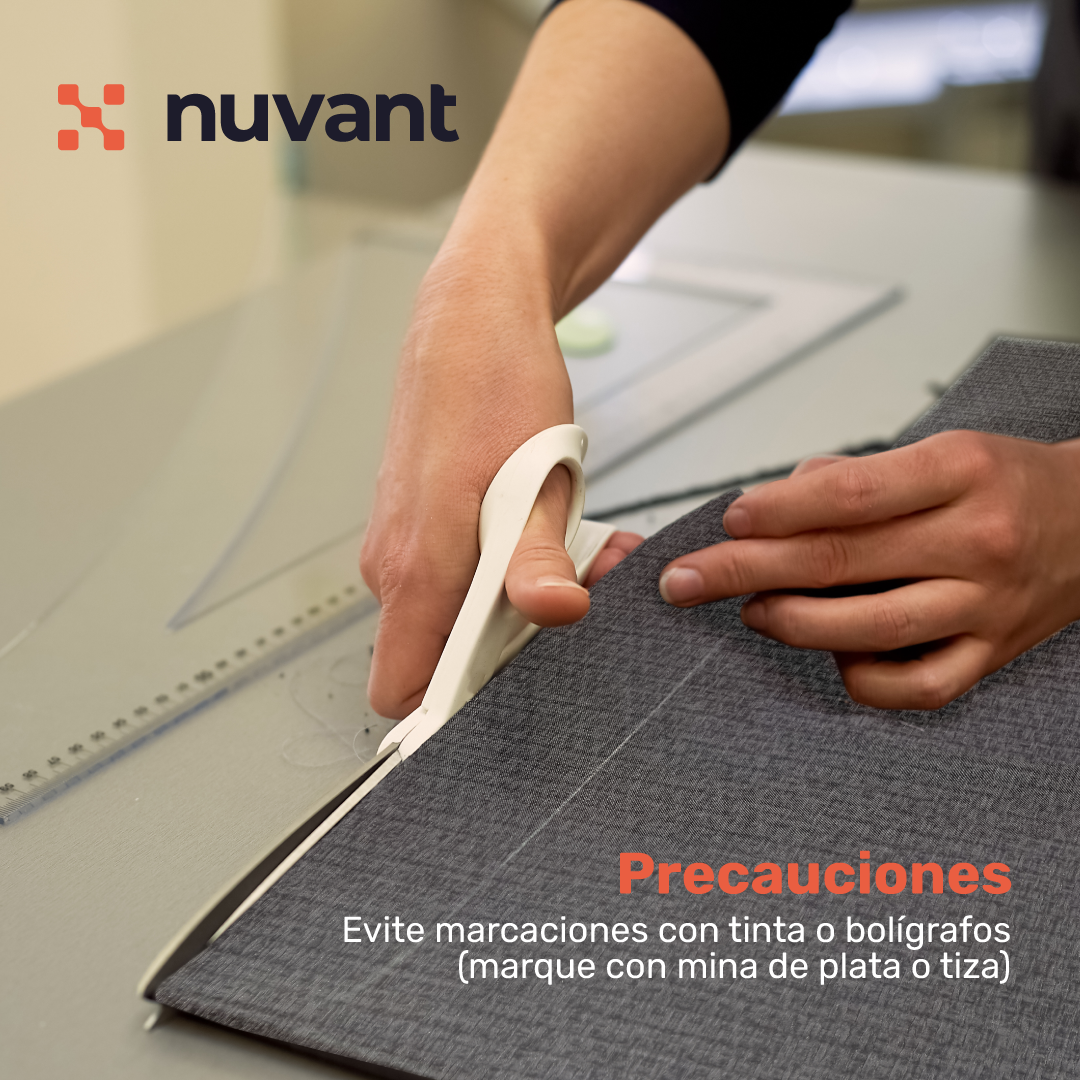
Make the cut with the help of objects suitable for cutting canvas, which ensure that the material is completely separated and does not cause damage to the fabric. Take into account the direction of the material before cutting the pieces to avoid possible changes in the appearance of the assembly.
Sealing Stage
Properly prepare and clean the area where the material will be sealed. Make sure the size of the seal made is suitable for the sealing performance in the application. The material is apt to be sealed by high frequency and hot air, the sealing conditions are specific to each sealing machine, therefore, it is recommended to use a small sample of material to establish the optimal sealing conditions before generating the seal. the whole assembly.
Assembly Stage
Make sure that the structure on which the material is supported is free of defects that cause damage to the material (sharp corners, irregular ends, etc.).
Take into account that the mechanical properties of the material define its applicability for each assembly in order not to exceed the maximum resistance indicated in the technical data sheet. During the assembly stage, points of failure typical of this stage can be generated, avoid leaving the beginning of tears or cracks in points of high tension that can generate an accelerated deterioration of the material.